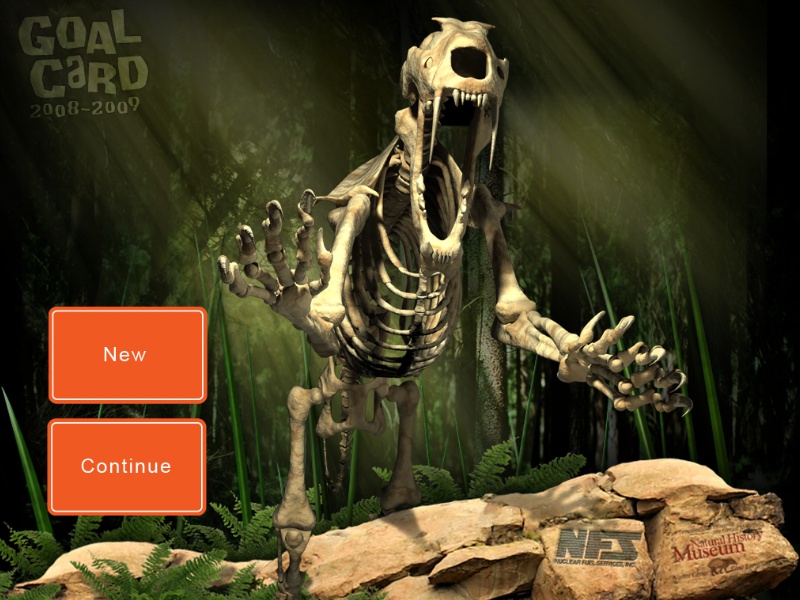
Sabre Tooth Puzzle Game (Blender)
A Few Notes:
You are free to use any of this code in your own projects.
(I would suggust using game 6. It has the most features / bug fixes).
This game was made for and only runs 100% correctly in blender 2.46. The save function will break in versions below this (and rotation might be reversed) and the lighting will mess up in versions higher than this. The lighting problem in newer versions, however, could probably be fixed if one wished to do so.
This game was designed primarily for a runtime and the camera rotation function uses the screen size in its calculations. While the camera rotation works pretty well in a blender window, it works better in a runtime.
To add a new puzzle:
--------------------------------------------------------
Do these steps in a seperate blend file (because it's easier):
Perform these steps in the puzzle blend file with all of the code and logic:
This section deals with some of the variables located under the "#Useful Variables" comment in the wkspc_init and wkspc_payload scripts, as well as a few other values that need to be changed:
Don't Forget:
You are free to use any of this code in your own projects.
(I would suggust using game 6. It has the most features / bug fixes).
This game was made for and only runs 100% correctly in blender 2.46. The save function will break in versions below this (and rotation might be reversed) and the lighting will mess up in versions higher than this. The lighting problem in newer versions, however, could probably be fixed if one wished to do so.
This game was designed primarily for a runtime and the camera rotation function uses the screen size in its calculations. While the camera rotation works pretty well in a blender window, it works better in a runtime.
To add a new puzzle:
--------------------------------------------------------
Do these steps in a seperate blend file (because it's easier):
- Model all the pieces
- Texture them (I baked AO and baked the texture, then combined them in a 2D app)
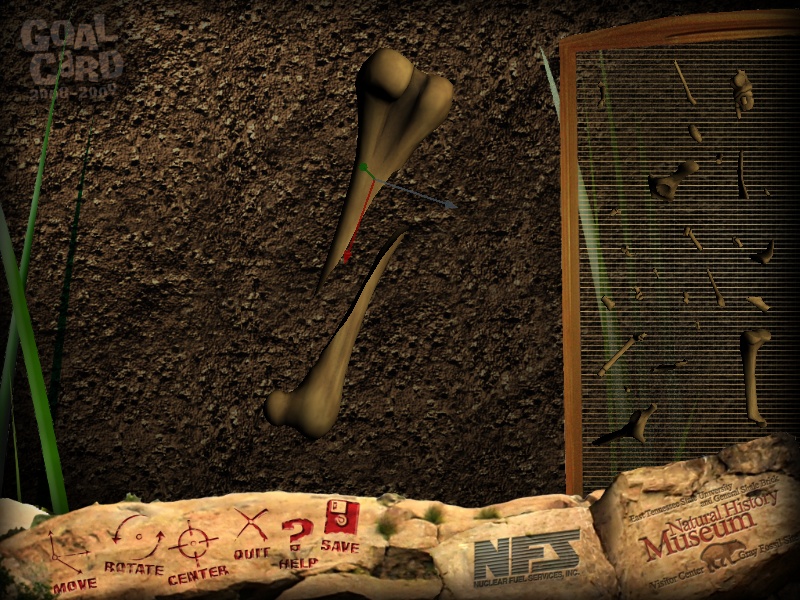
- Turn on lights for their faces (tab into edit mode, select a face, activate the "Light" button under the Editing buttons in the Texture Face panel, select all of the faces, press Ctrl+C, and copy Active Mode).
- Set an appropriate orientation for the pieces (this will be used by the translation and rotation widgets).
- All of the pieces should be arranged so that they form the object you are trying to put together (don't scatter them around yet).
- Important: Make sure they all have a scale of 1.
- Also, they should all have the same prefix. For example, in these games, all of the puzzle objects are named "skel.###". The prefix can be specified in the code. The important thing is that they are all the same.
Perform these steps in the puzzle blend file with all of the code and logic:
- Delete the puzzle pieces in the workspace scene and the e_shelf scene.
- Append the objects into the workspace scene on layer 1. Move them out of the way of the camera.
- Select all of the puzzle pieces and press Ctrl+L and make links To Scene >> e_shelf.
- Go to the e_shelf scene and enable layer 1.
- Select all of the puzzle pieces, and press Alt+D to make a linked duplicate. Move the newly duplicated puzzle pieces away from the older puzzle pieces.
- Delete the older puzzle pieces (the ones with blue dots).
- Move the remaining puzzle pieces (with pink dots) to layer 3 and then go to layer 3.
- Scatter the pieces around (keep grouped ones together if you plan on using them, these groups will be discussed later). Try to keep them near z=0 because they will be moved close to this when moved from the workspace back to the shelf. You do not want their size to suddenly change. It doesn't have to be exactly z=0, you can just eyeball it and it will look fine. Also, you CAN scale these pieces. If you are using a base piece - discussed later - then you can make it really small. You can also make the other pieces larger or smaller as long as their size is consistent (ie. all pieces except for the maybe the base have a scale of .75).
This section deals with some of the variables located under the "#Useful Variables" comment in the wkspc_init and wkspc_payload scripts, as well as a few other values that need to be changed:
- snapDistance (wkspc_payload under "#Useful Variables") is the minimum distance between 2 objects center points for them to snap together. The larger the number, the easier it is to snap pieces together.
- snapOriDistance (wkspc_payload under "#Useful Variables") is how close to the correct orientation a piece has to be before it snaps into place. This number is horribly unintuitive (it is not degrees or radians, but rather the distance from the end points of the axis). The larger the number, the easier it is to snap it into place. Increase this number slowly.
- gl.saveFileName (wkspc_init under "#Useful Variables") is the name for the save file.
- gl.validFileHeader (wkspc_init under "#Useful Variables") is used to check to see if a file is actually a save file for this game (mainly put in so that someone would not load a saved game from game4 into game5 for example). This can be any string of text.
- objNamePadding (wkspc_init under "#Useful Variables") is the number of digits in the object names. For example, this would be set to three if the pieces were named "skel.###".
- objNamePrefix (wkspc_init under "#Useful Variables") is the prefix for all of the puzzle piece names. For example, "OBskel.". Do not forget the "OB" part, it is needed by blender.
- gl.baseName (wkspc_init under "#Useful Variables") is the suffix for the base object if there is one. (Set gl.baseName="" if there is not one). The base object is an object that will appear in the center of the 3D workspace when the game starts. The base object, in the case of the sabre tooth, consisted of the puzzle pieces the player had already completed in previous games (legs, tail, spine, etc) which were combined into one object.
- gl.initCamZoom (wkspc_init under "#Useful Variables") is used to zoom out or in so that the base object is centered in the camera well when the game begins. This can be set to 0 if there is no base object.
- gl.os (wkspc_init under "#Useful Variables") honestly does not matter. It is used in the save game feature to determine where to save the file. You should probably just leave it as "mac" regardless of your os.
- gl.runtime (wkspc_init under "#Useful Variables") is EXTREAMLY important when exporting a runtime for a mac. Basically, this should be set to 0 unless you are exporting a runtime for the mac (and not just playing it in blender). When the save function writes a save file, it writes it in the same directory as the blend file or executable. For Linux runtimes, Windows runtimes, and playing the file from blender, it can just use the path returned by python. However, for Mac runtimes, it must go a few directories up from inside of the .app file. If you are playing the game in any way except for a Mac runtime, leave this at 0. If you are exporting a Mac runtime, make sure that this is set to 1 and that gl.os is set to "mac".
- quickCheckPieces (wkspc_init down in the file a little ways) is where you define which pieces snap to whcih. Use numbers from the workspace scene (not the e_shelf scene). For example, if you want piece 19 to be able to snap to pieces 3, 6, and 9; one line of the variable would be:
19:[3,6,9],If you have pieces that are part of a group, only choose one piece of the group (I used whichever had the smallest number) and use that to define which pieces can snap to a group and which pieces the group can snap to. Basically, treat one piece of the group as a representative of the whole group. For example, if 5, 7, and 8 were in a group, just tell other pieces to snap to 5 and declare which pieces the group can snap to by using "5:[#,#,#,...],". For the pieces that are left over in the group (7 and 8 in this example), set them to be empty: "7:[], 8:[],". They will inherit what to snap to from object 5.
- quickGlueGroups (wkspc_init down in the file a little ways) deals with initial glue groups. To explain groups real quick: say you had a long curved puzzle piece with a break on each end. You wanted to make it so if the user clicked on one side, the translation/orientation widget would show up near the that of that side to make aligning it easier. If the user clicked on the other side of the piece, the widget moved to make aligning that side of the object easier. To accomplish this, use two or more seperate objects, each with their own center point and orientation. Then, declare them as a group in this variable by typeing (in the case of the 5,6,7 example) "5:[6,7],". They will be treated as a single object in the game, but you can get different widget positions depending on where you click the puzzle piece. Important: Make sure that the pieces of a group are aligned together correctly on the e_shelf scene. If they are seperated, they will seperated in the game.
Don't Forget:
- If you are using this file as a main base for creating a puzzle game, you will probably want to change the graphics before releasing it.
| Game 1 (hind leg) |
Game 2 (tail) |
Game 3 (spine) |
Game 4 (rib cage) |
Game 5 (front leg) |
Game 6 (skull) |
| blend file | blend file | blend file | blend file | blend file | blend file |
| Windows Runtime | Windows Runtime | Windows Runtime | Windows Runtime | Windows Runtime | Windows Runtime |
| Mac Runtime | Mac Runtime | Mac Runtime | Mac Runtime | Mac Runtime | Mac Runtime |
| Linux Runtime | Linux Runtime | Linux Runtime | Linux Runtime | Linux Runtime | Linux Runtime |